


Created my Photobook With Mixam
This video shares my complete journey creating and printing my first real photo book, Safari Encounters, with Mixam, from the exciting unboxing and initial disappointment with washed-out colors in the test print, to using their easy software for layout and text, fixing the issues, and ending up thrilled with the final rich, high-quality result.
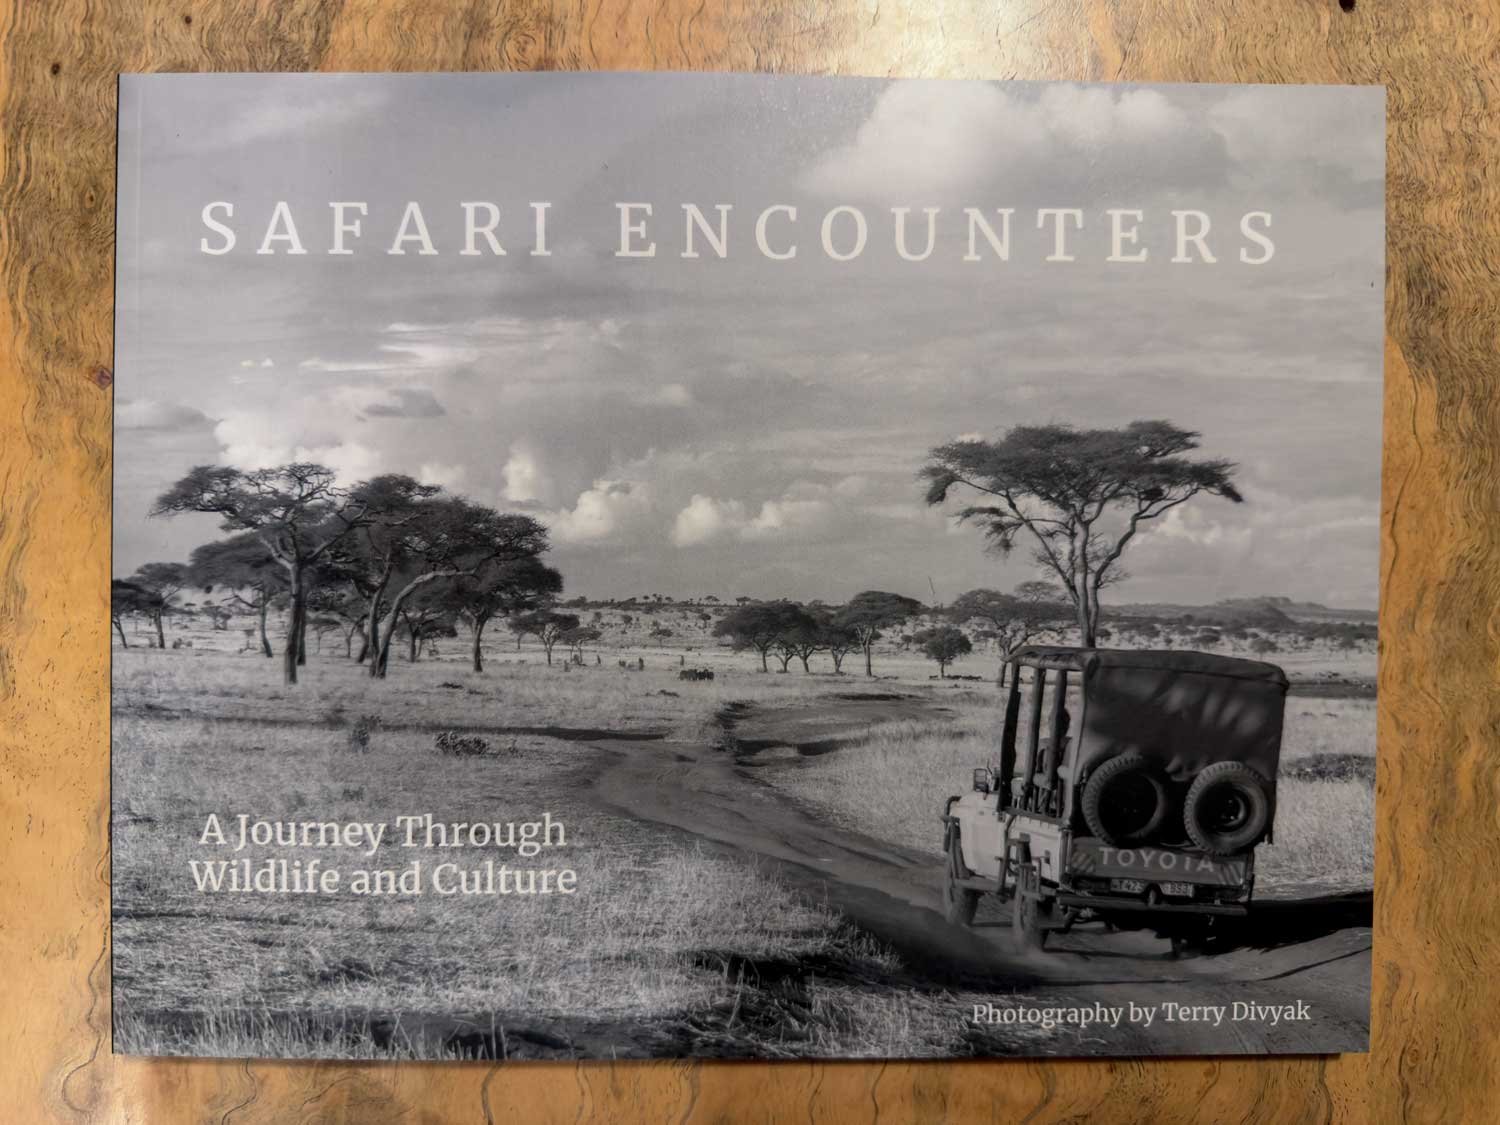
If you've ever stared at thousands of photos on your hard drive wondering how to turn them into something tangible like a real photo book, this video is for me sharing my first real experience creating and printing one with Mixam. I put together a 140-page collection of my favorite travel photography from the past ten years in Africa, mostly Tanzania, with about seventy images plus stories behind some of them. I walk through the unboxing, my initial disappointment with the print quality, how I used their software to build it, the fixes that made everything look great in the final version, and why I'm now really proud of the finished book. It's called Safari Encounters, and it's become a little legacy piece for my family and anyone who loves wildlife and culture.
Unboxing the First Copies
When the package arrived, I had no idea what to expect since I had never seen a test print or the final product.
I ordered forty copies in grayscale landscape format, 8.38 x 10.88 inches.
Chose satin pages with 100 lb text for a richer feel, perfect binding, satin 100 lb cover with matte lamination.
Added full cover foiling and shrink-wrapped them in bundles of five for easier gallery inventory.
Initial Reaction and Disappointment
Opening the box was exciting at first.
The cover looked stunning with that satin finish and rich feel.
Flipping through, one photo immediately stood out as beautiful.
Then I noticed the colors were washed out, contrast was low, blacks looked gray, and details were lost in many images.
I felt pretty bummed because the test print did not match what I saw on my screen.
How I Built the Book with Mixam Software
I started in their online tool and found it straightforward once I got going.
Set up the book size and options first, then downloaded a PDF template for the cover (front, spine, back) to use as a guide for bleed and layout.
Switched to expert mode for more control over resizing, rotating, and positioning frames.
Dragged and dropped photos and added multi-line text boxes; used Crimson text font at a larger size (24-28 point) for readability.
The arrange pages feature was super helpful—just drag and drop to reorder entire spreads.
Added images by uploading (even large 25 MB files worked fine), adjusted fit, centered horizontally and vertically, and extended to bleed where possible.
For odd-shaped photos like my zebra panorama, I centered them without forcing bleed and copied pages to keep layouts consistent.
Saved frequently so I could step away and come back.
Why the Final Book Turned Out Great
The initial test print looked flat, but Mixam communicated clearly about formatting issues.
They pointed out problems, I made corrections, and the final production run looked much better.
Richer blacks, better contrast, and colors popped the way I intended.
Now I'm thrilled with how it turned out, the washed-out look was fixed in the main batch.
A Quick Flip Through Safari Encounters
This book captures ten years of adventures in Tanzania.
Cover photo from Tarangire National Park with beautiful leading lines, horizon, and clouds.
Simple title, my name, contact info, self-published note, and a dedication to my friend Ken Redmond who passed in 2023 and taught me so much about wildlife.
Inside features my best wildlife shots (migration, hippos, leopards, jumping Maasai), cultural moments (medicine man at Olduvai Gorge, Hadzabe, Datoga), and everyday scenes like Moto Wambo banana transport.
I kept text minimal to let photos breathe but added stories behind some favorites.
One hippo shot was inspired by David Yarrow's famous Dexter image, I got low for a similar angle.
Final Thoughts on Mixam and the Book
I'm genuinely proud of this project.
It feels like a meaningful legacy after a decade of travel, something for my kids, grandkids, and anyone who enjoys these images.
Mixam staff communicated well, helped fix issues, and delivered high quality at an affordable price compared to other services I've tried.
People have already bought copies, and feedback on the larger text has been positive, easier to read as we get older.
I kept embellishment light so the photos stay the focus.
Overall, 100 percent happy and I will definitely use Mixam again.
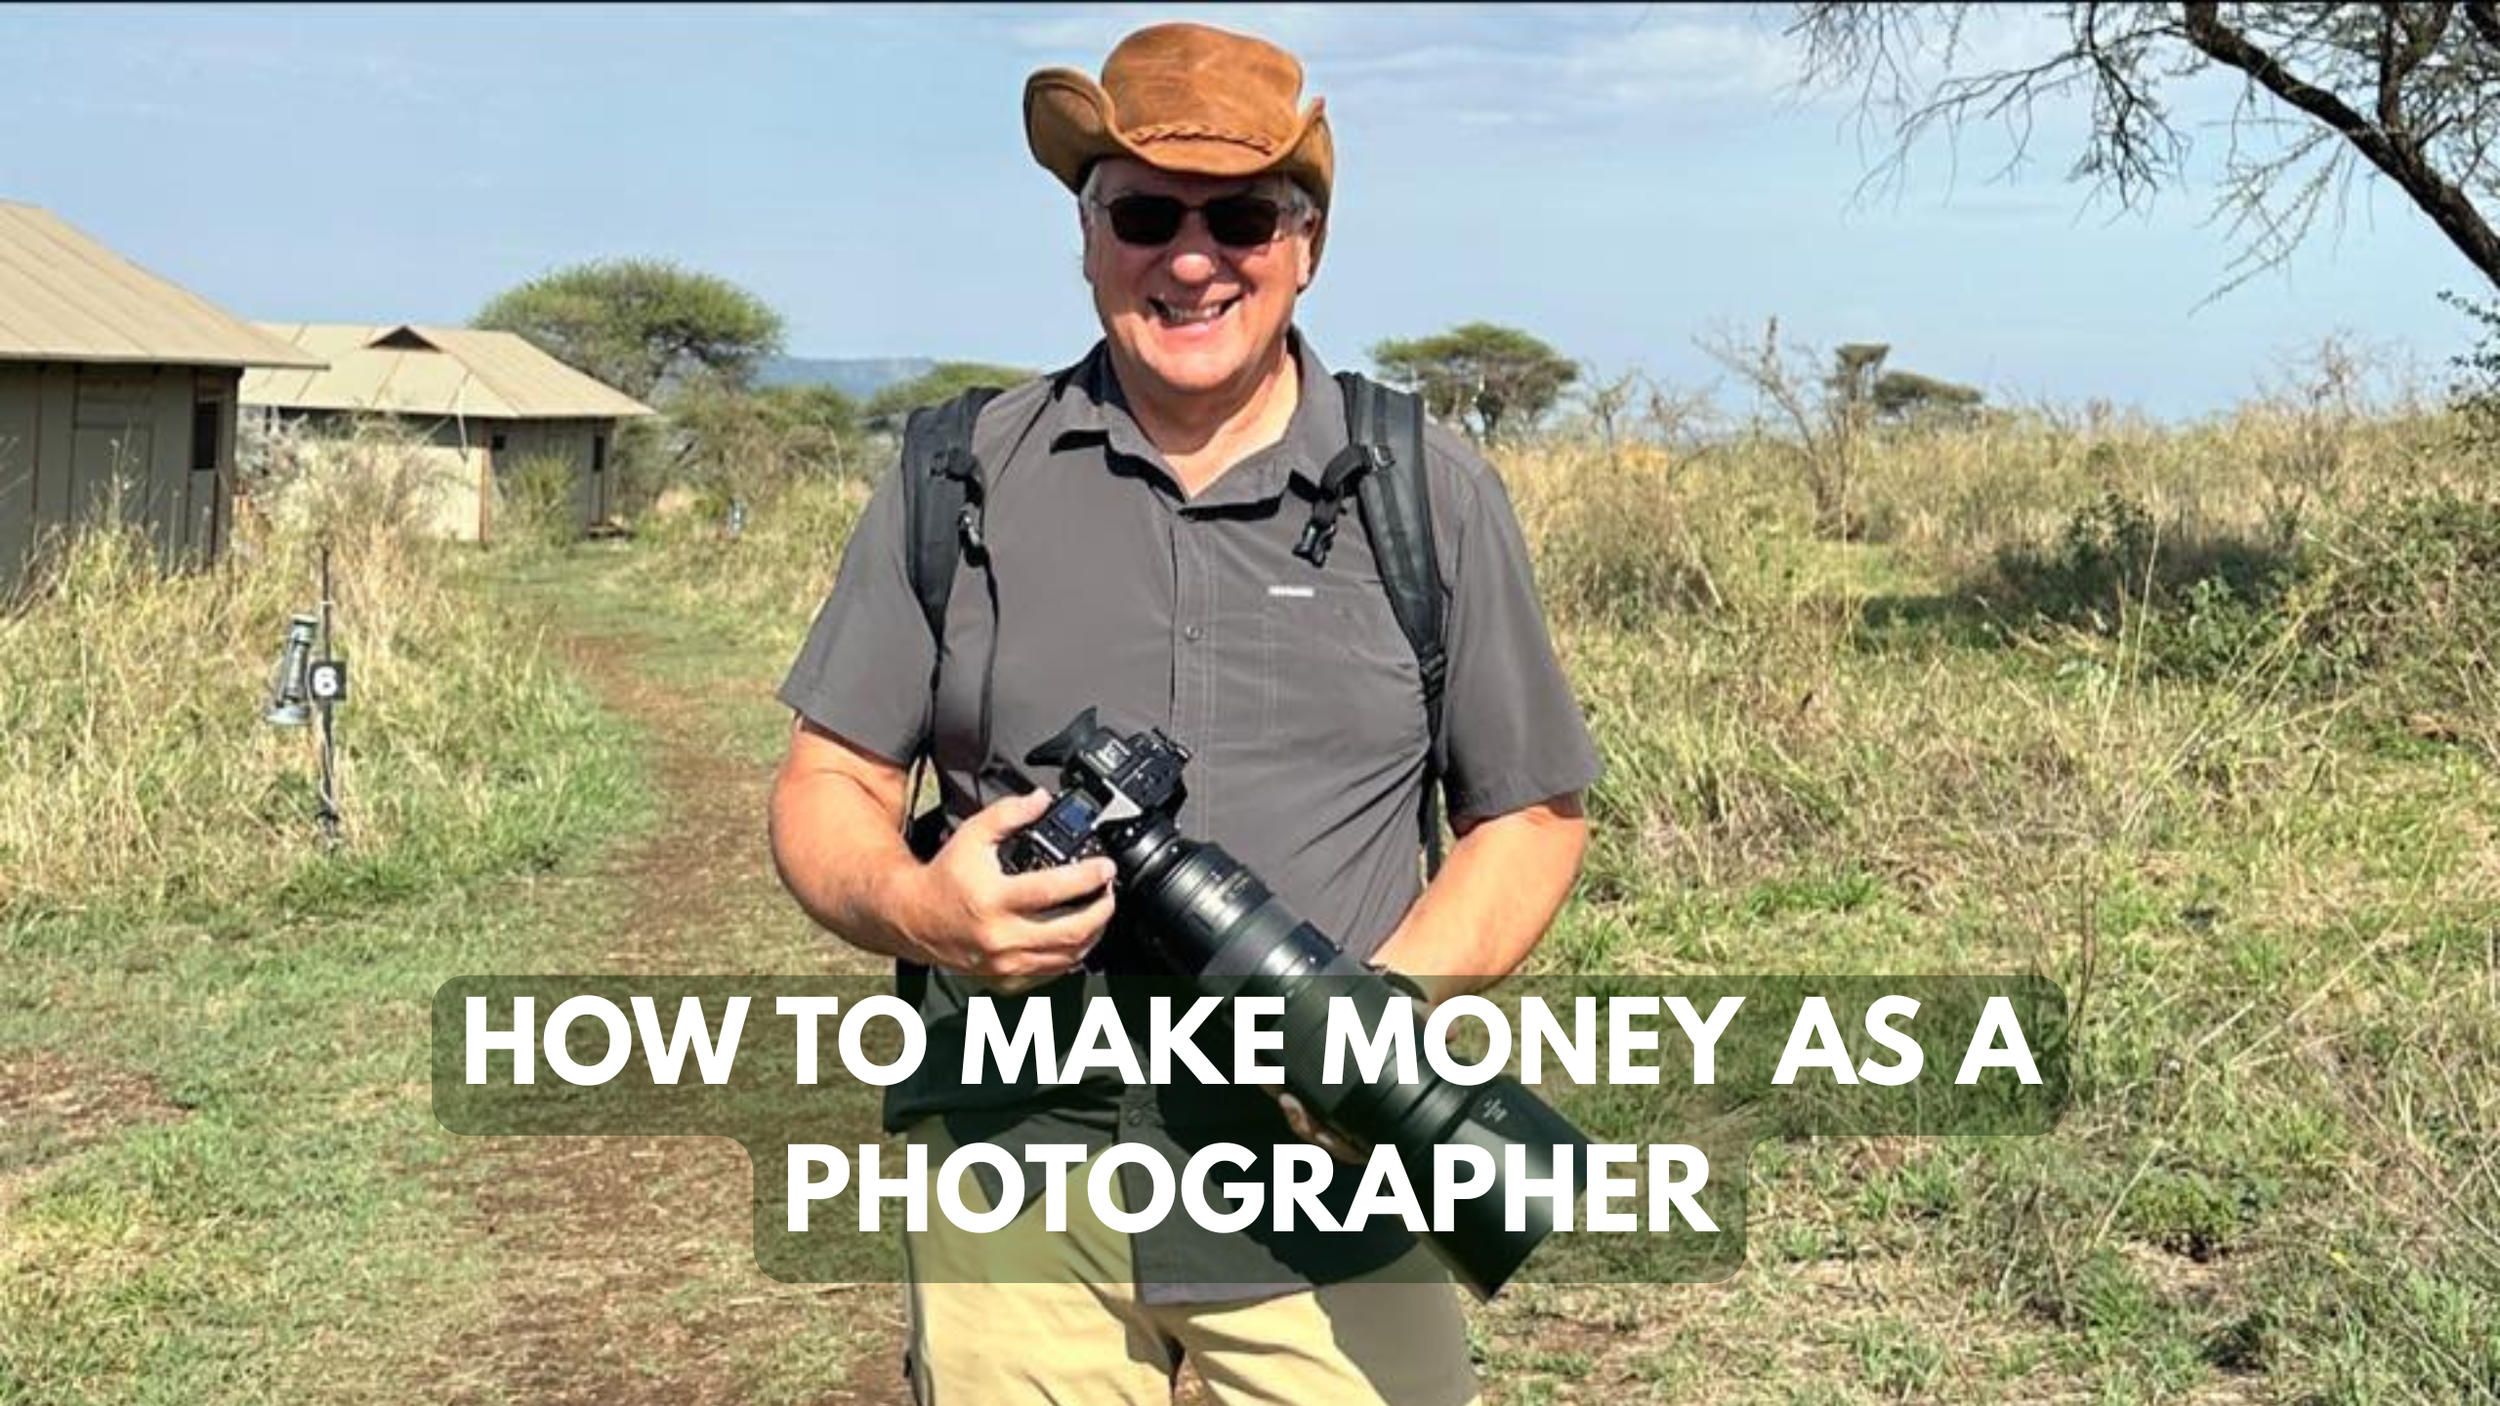
How to Make Money with Photography
This video is my honest take on how to start making money as a photographer, based on what actually worked for me over the years. I share the key steps that took me from struggling hobbyist to selling large prints, leading photo tours, and turning travel into a career.
I get asked all the time how photographers actually make money from their work, and my usual quick answer is that a lot of us end up teaching, which is true, but there's so much more to it than that. In this video, while driving on my commute, I walk through the practical steps I believe really help elevate your photography from hobby level to something people will actually pay for. I cover the fundamentals that made a huge difference for me, from nailing composition to editing like a pro, choosing great subjects, and even the mindset of putting yourself out there. If you're serious about turning your passion into income, these are the things I wish someone had laid out clearly for me years ago.
Step 1: Master Composition – Start with the Rule of Thirds
Composition is probably 90 percent of what makes a photo sellable.
Learn the rule of thirds early; it was a game-changer for me when I finally understood it.
Think of it like learning to drive: master the basics first (gas, signals, wipers) before you can really handle the road.
A lot of people dismiss the rule of thirds, but it's a solid foundation you can build on or break once you know it well.
Step 2: Understand the Exposure Triangle
You need to control your camera in manual mode to get consistent, high-quality results.
Know exactly what ISO, aperture, and shutter speed do and how they interact.
Most of the time my ISO stays fixed, and I balance aperture and shutter speed like a teeter-totter or bongo board to keep proper exposure.
Example: If I move from 1/200 at f/5.6 to 1/400, I open up to around f/2.8–f/3.5 to compensate.
Aperture tip: Smaller number (like f/2.8) means less in focus; think "at f/2.8, two things in focus; at f/5.6, about five and a half." Higher numbers let in less light but increase depth of field.
Step 3: Put Something Interesting in Front of Your Lens
Technical skill means nothing without compelling subjects.
Figure out what excites you most; for me it's travel photography, especially environmental portraits of tribes like the Maasai, Hadzabe, Datoga, and Mursi in places like the Omo Valley.
I have tried many genres over the years, sports, music, street, bands in Seattle, but I settled on what truly interests me about six or seven years ago.
If your photos feel boring, the subject probably is too; niche down to what lights you up.
Step 4: Always Shoot RAW
Shooting RAW gives you far more flexibility and protects your work.
You cannot overwrite the original file; you have to export to JPEG, TIFF, or DNG first.
I once accidentally overwrote my only copies of edited files because I was not shooting RAW—lesson learned.
In low-light situations like shooting Maasai inside a dark school at ISO 6400, I overexposed shots but recovered them completely in post thanks to RAW's dynamic range.
RAW files are 14-bit (4096 colors per pixel) versus JPEG's 8-bit (256 colors); the extra information is worth it, memory is cheap.
Step 5: Learn to Edit Your Photos
In today's digital world, editing is essential for professional results.
Get it right in camera as much as possible, but use the powerful tools available now.
Almost every pro who makes money edits their images.
I do most of my work in Camera Raw (similar to Lightroom) for white balance, exposure, and basic adjustments.
Check out the YouTube channel PiXimperfect for quick, detailed tutorials that explain everything clearly.
Spend time playing with sliders on your RAW files; you'll be amazed what you can achieve.
Step 6: Only Show and Sell Your Best Work
Quality over quantity every time.
Social media is full of billions of photos; people get fatigue, so make yours stand out by posting only the strongest ones.
Posting hundreds dilutes your brand; curate carefully.
Use high-quality printers, never Walmart or cheap options.
I use Digital Silver Imaging for black-and-white prints; they are expensive but archival and stunning.
I recently sold a 40x60 print for close to $1,100, and the print cost over $200, I stand behind the quality.
Test different canvas and print vendors; view large sizes up close and from a distance to ensure they hold up.
Step 7: Talk About Your Work – Open Mouths Get Fed
You have to promote yourself.
My grandmother always said open mouths get fed—share what you do with friends, coworkers, everyone.
Conversations spark opportunities; someone might need portraits, event coverage, or know a realtor who wants staging photos.
I know it's tough for many of us introverted photographers, but stepping out of that comfort zone pays off.
Print samples for friends or potential clients; it's an investment in marketing.
Step 8: Photography Opens Doors to Amazing Experiences
Once the skills come together, the rewards go way beyond money.
Photography has given me a VIP pass to incredible people and places.
I have shot for publications, interviewed racers like Michael Andretti, photographed famous bands that became friends, and now lead photo tours in Tanzania, Bali, and Thailand.
It took time, I'm in my 60s and only now hitting my stride with gallery sales, large prints, and books, but the journey has been worth it.
Keep working at it; selling photography is hard, but finding your niche and persisting can lead to extraordinary opportunities.
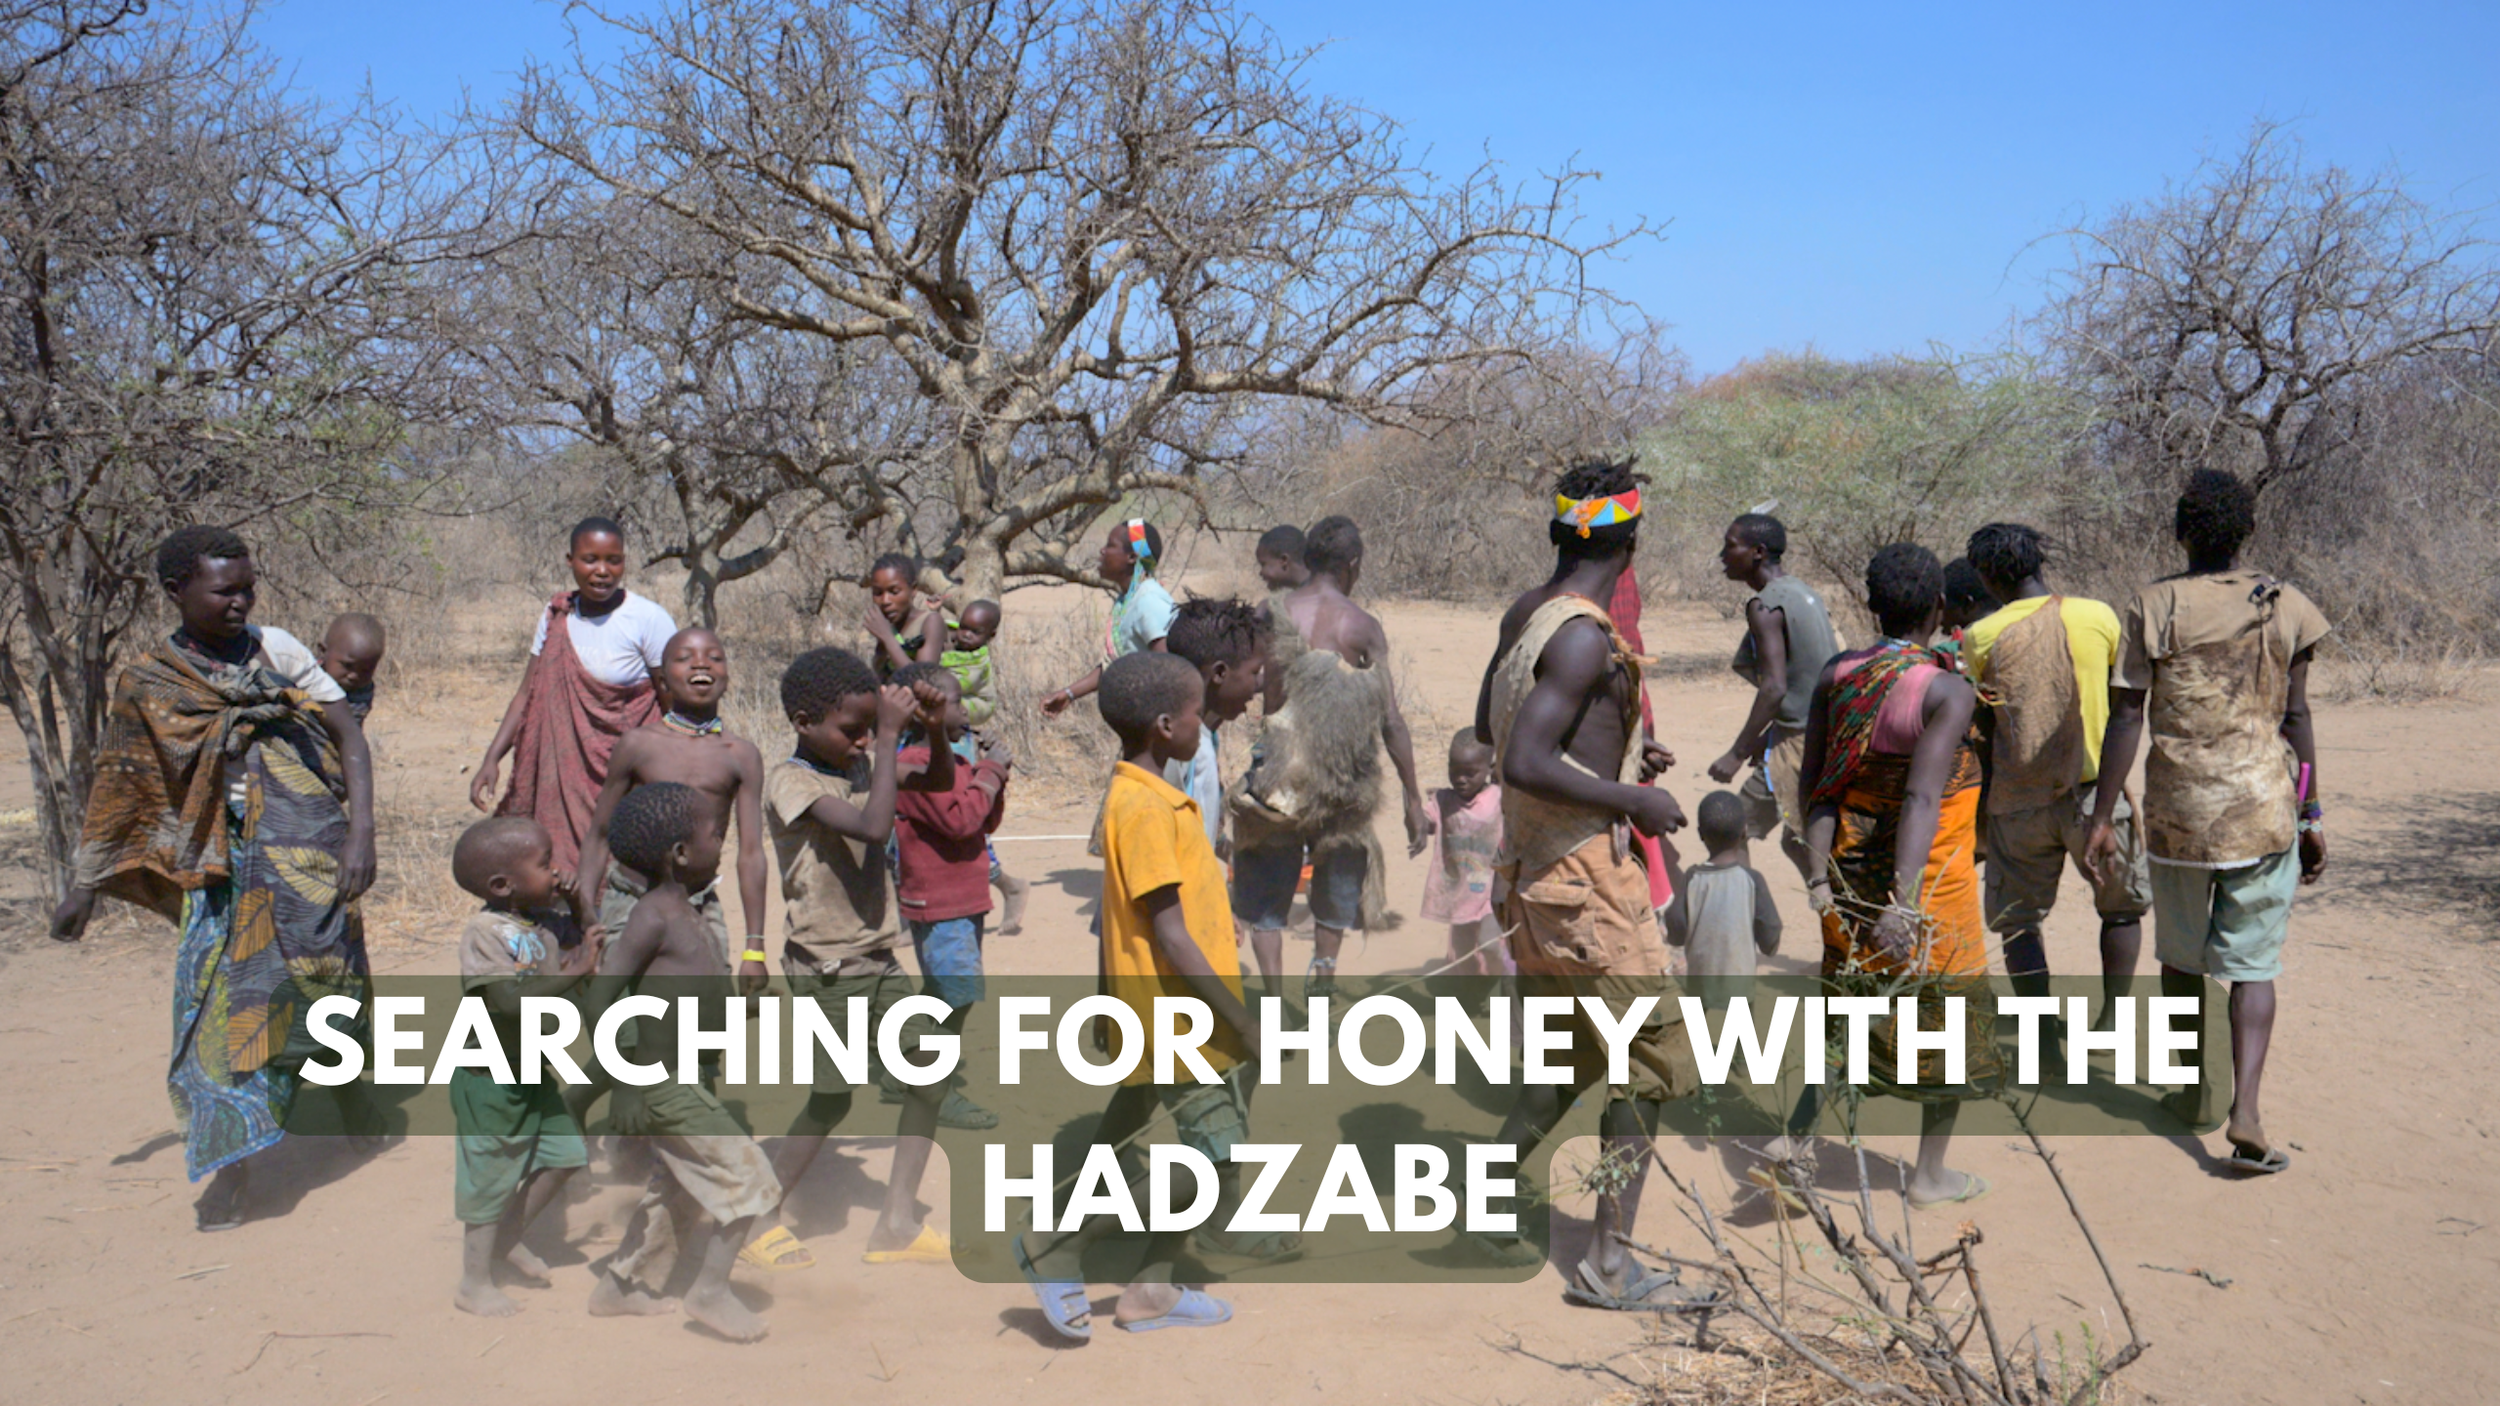
We Search for honey with Bushmen
This video brings you along on an incredible day honey gathering with the Hadzabe hunter-gatherers near Lake Eyasi in Tanzania. Join me as we search towering trees for wild hives, watch the men spark fire the ancient way, use smoke to safely harvest honeycomb, and then taste what I honestly call the sweetest, most delicious honey of my life.
Hey everyone, it's Terry here, and I have to say this is one of my favorite adventures yet. I have spent time with the Hadzabe people near Lake Eyasi in Tanzania on several trips, but I had never joined them for honey gathering until this day. This video takes you step by step through the entire experience, from meeting the group, searching the trees for wild hives, building a fire the traditional way, using smoke to calm the bees, harvesting the honey, and finally tasting what turned out to be the most incredible, sweetest honey I have ever eaten. Their excitement, unique clicking language, and pure joy make the whole thing unforgettable.
Meeting the Hadzabe and Heading Out
We start by connecting with the group in their territory near Lake Eyasi.
The Hadzabe are one of the last remaining hunter-gatherer communities in Africa.
They warmly welcome us and prepare to head into the bush in search of honey.
Searching for the Hive
Finding honey requires sharp eyes and knowledge of the landscape.
The men scan tall trees and listen for bee activity.
They climb or use natural features to locate hidden hives high up in the branches.
Making Fire the Traditional Way
No matches or lighters here—just skill and natural materials.
They create fire using friction with simple tools like a stick and a base board.
Once the fire starts, they build a small smoky blaze to carry along.
Smoking the Bees and Harvesting
This is where things get exciting and a little intense.
They use the smoke to calm or drive away the bees so they can safely approach the hive.
The men carefully open the hive and extract the honeycomb.
You can hear their animated clicking language and laughter as they work together.
There is a fun moment of playful arguing or excitement over who gets what portion.
Tasting the Fresh Honey
The payoff is worth every step.
We try the honey straight from the comb right there in the bush.
I describe it as the sweetest, richest, most succulent and viscous honey I have ever tasted—better than anything before, finger-licking good.
The flavor is pure, wild, and incredibly intense.
They carefully bottle some to take back, keeping it for later.
Wrapping Up the Adventure
The day ends with smiles, more clicking conversations, and a deep appreciation for their way of life.
The Hadzabe's harmony with nature shines through every part of this process.
It is raw, joyful, and completely authentic.
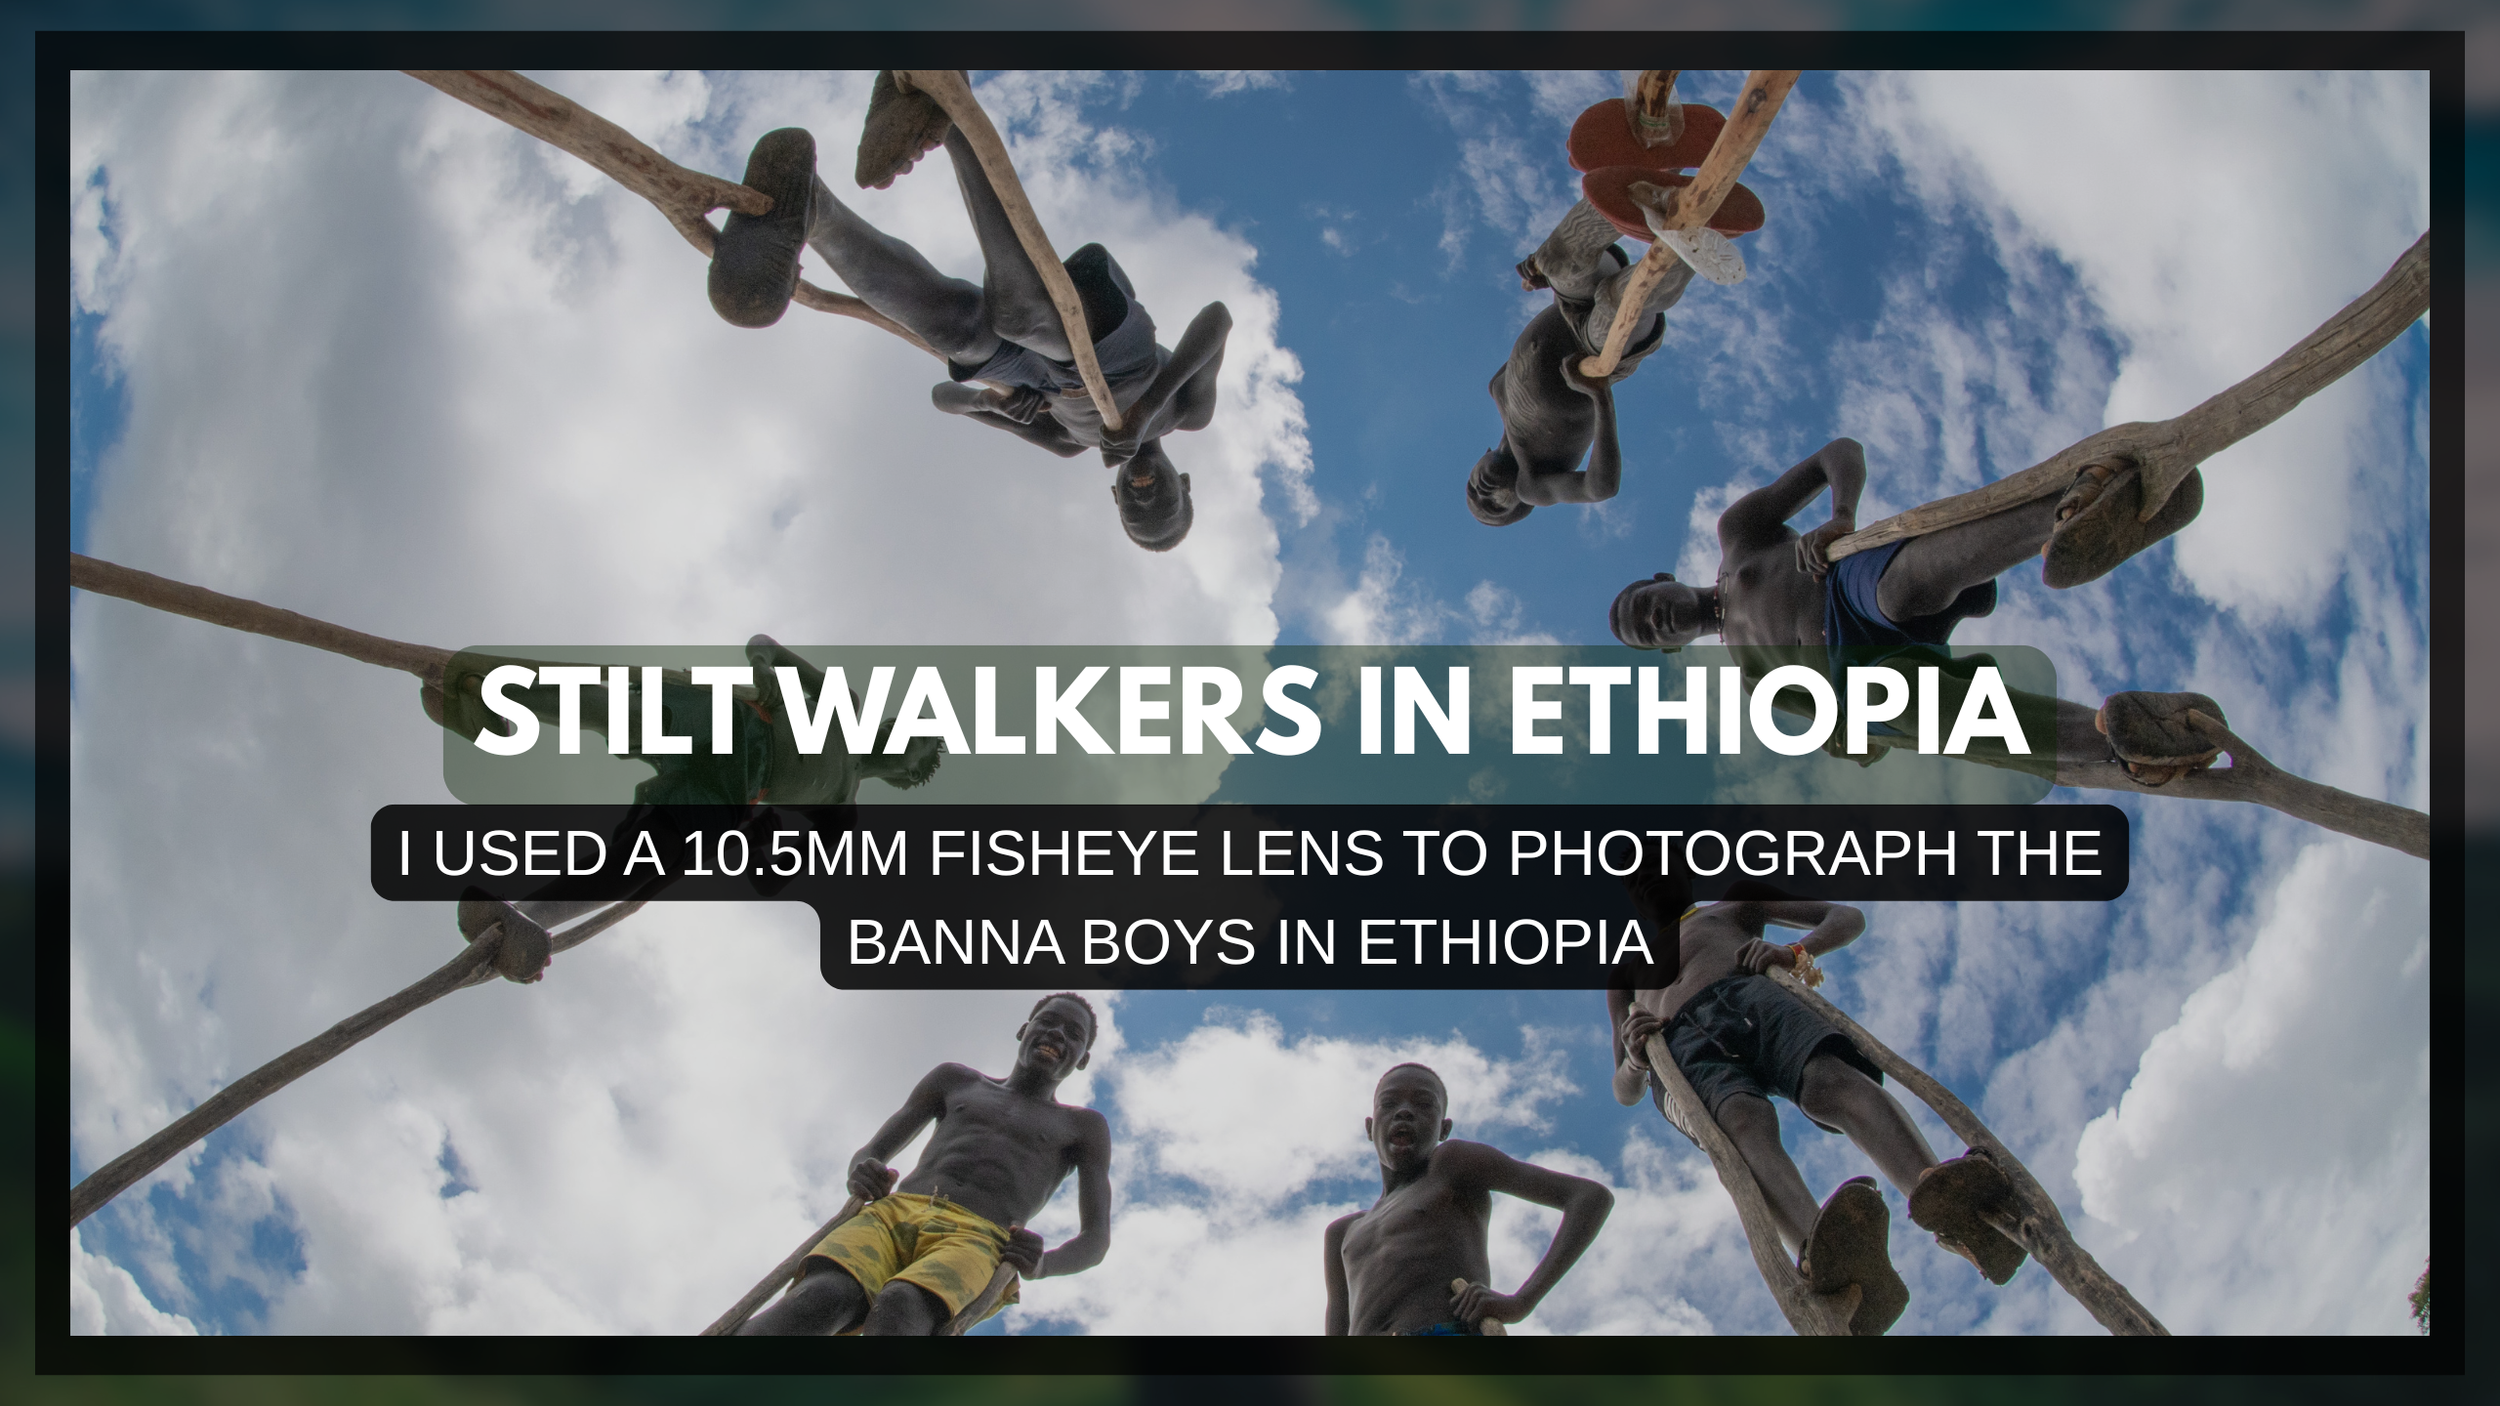
Stilt Walking Boys in Ethiopia
This short video brings you along for a fun, creative moment with the incredible Banna Boys of Ethiopia's Omo Valley, those towering Giraffe Boys who charm tourists on their tall stilts. Join me as I lie on the ground with a fisheye lens to nail my dream group shot, carefully direct the group while they step over me.
Hey folks, if you've ever dreamed about heading to Ethiopia, especially the Omo Valley, chances are you've heard about the famous Banna Boys, also called the Giraffe Boys. These young guys from the Banna tribe greet tourists by walking on super tall wooden stilts, and I was so excited to meet them that I had a specific photo idea planned before we even arrived. In this quick fun video, I share the whole behind-the-scenes process of trying to capture that perfect low-angle fisheye shot, dodging their careful steps, directing the group, and even chatting a bit about their lives through our guide Ermie. It's a lighthearted look at one of the coolest little cultural encounters in the region.
Planning the Perfect Shot
I came prepared with a clear vision for something unique.
I wanted to use my 10.5mm fisheye lens and shoot from the ground up while the boys stood in a circle around me.
The wide distortion would really emphasize their height and make the image feel dynamic.
On-Location Adjustments
Things didn't go exactly as planned at first.
We started on the road, but traffic made it impossible to get everyone organized safely and quickly.
So we moved up to a small hill for more space and better control.
The boys walked right over me on their stilts, so I had to stay super low and careful to avoid any accidental steps.
Capturing the Group Photo
I experimented until it came together.
I shot in both portrait and landscape orientations.
I lay flat on my back for that dramatic low perspective.
With some directing, we finally got them positioned the way I pictured.
The final group shot turned out really close to what I had in mind and looked awesome.
A Quick Chat Through Our Guide
Once the photos were done, I asked Ermie to help me ask the boys a few questions.
They are all family members.
The leader pointed out the youngest in the group.
Stilt walking for tourists started with other people in the area, and now these guys do it too.
They perform whenever they can, not just certain days.
Many of them had school that morning and came out afterward—pretty cool how they balance both.
Finishing with a Portrait
I wrapped things up by asking one of the boys for a close-up portrait.
The result gave a nice, direct, and striking look at one of these talented young stilt walkers.
Optic Owl - MY AI Photography Coach
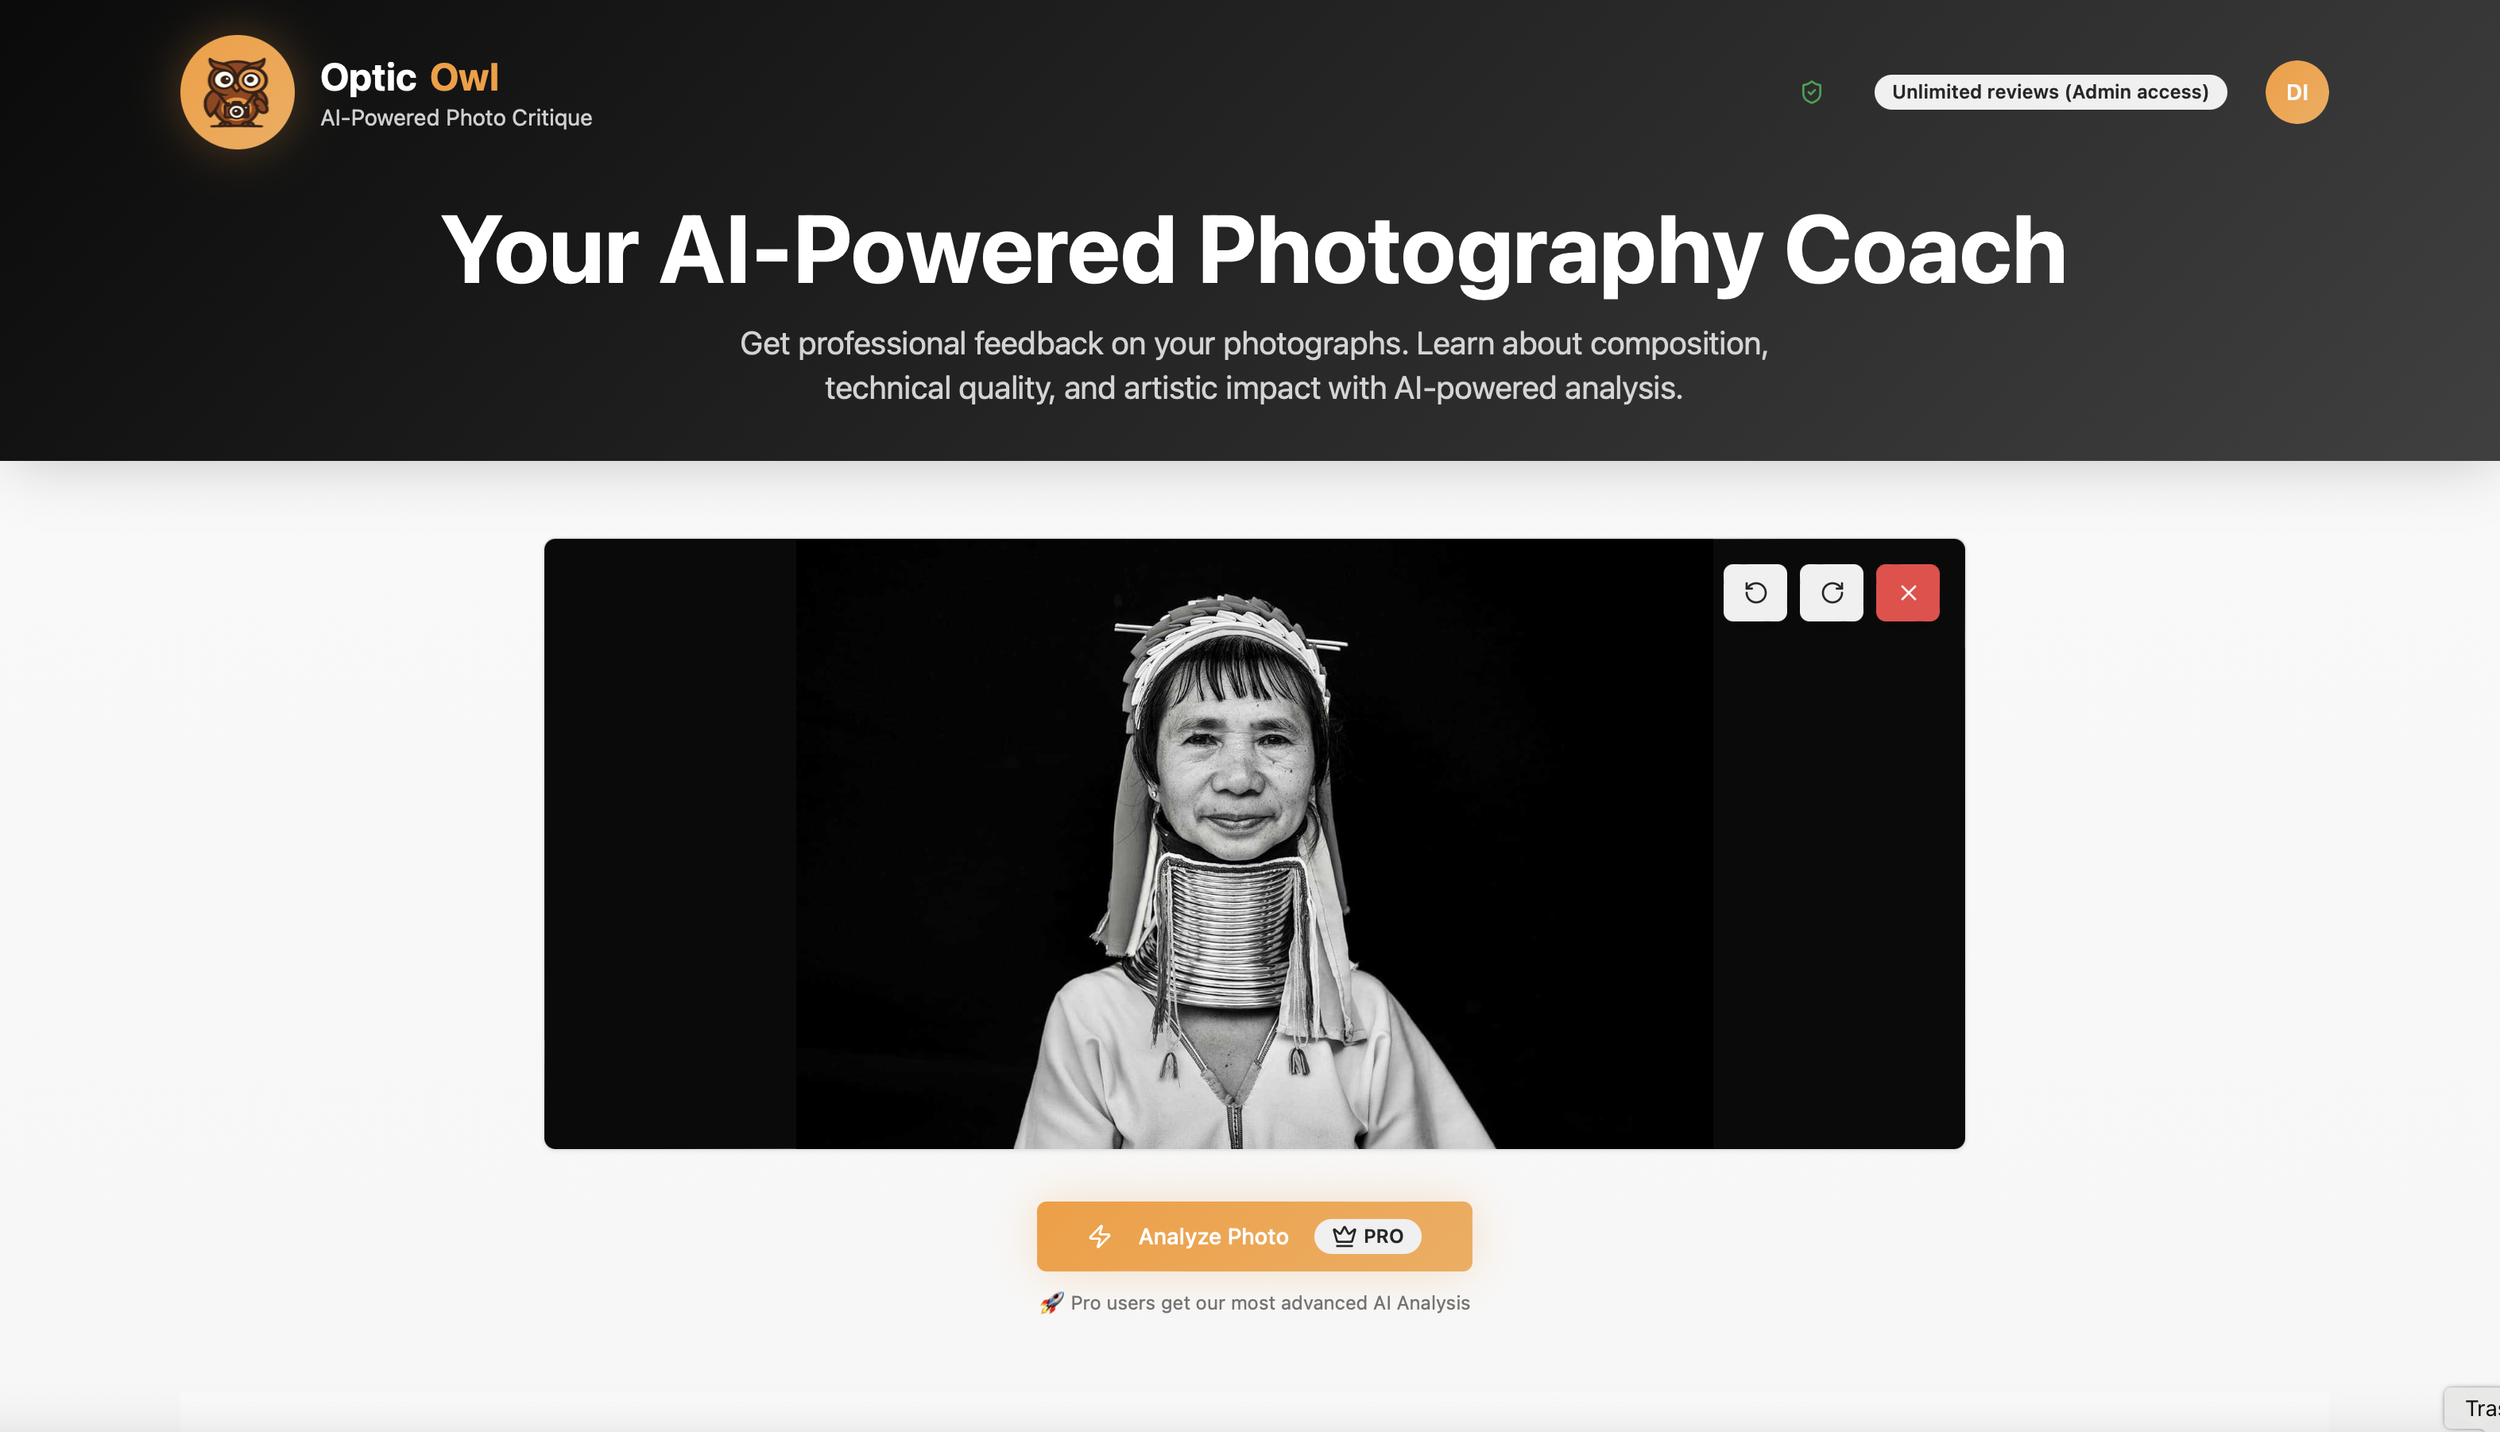
Terry here dropping some news about my new baby, Optic Owl AI—a smart SaaS tool that gives photographers pro-level critiques on their images using AI. I created this as a way to help photographers improve on their composition.
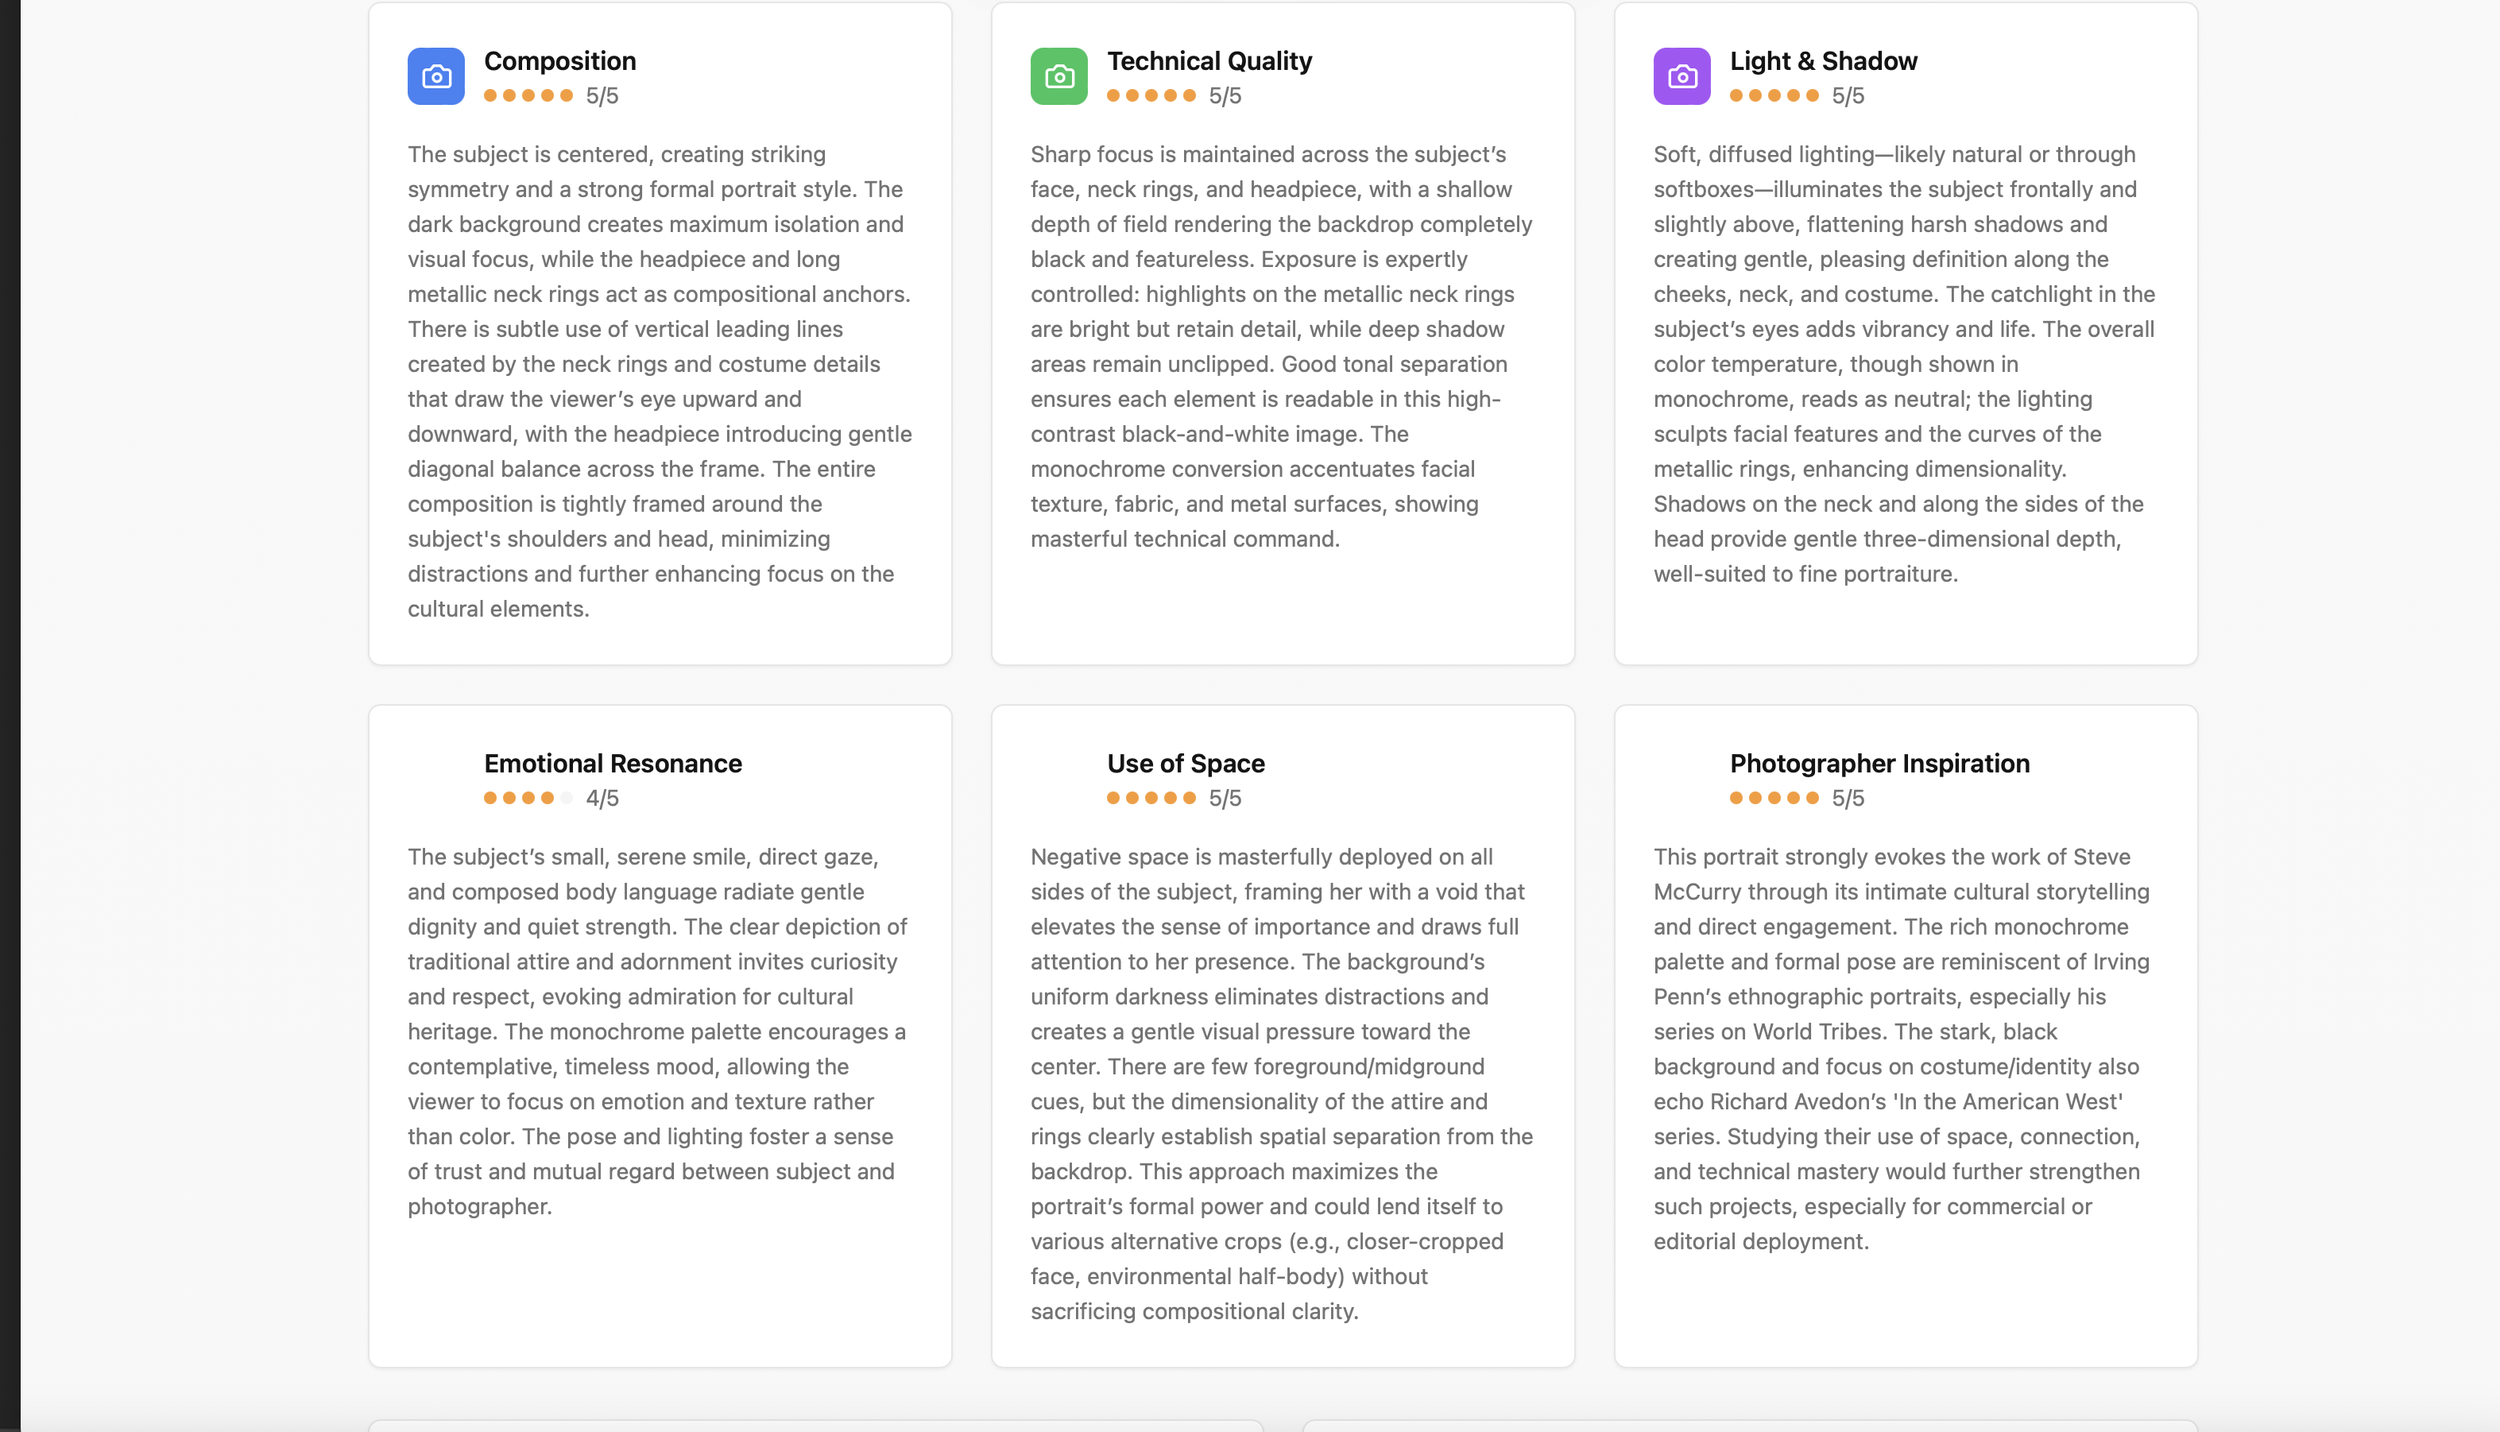
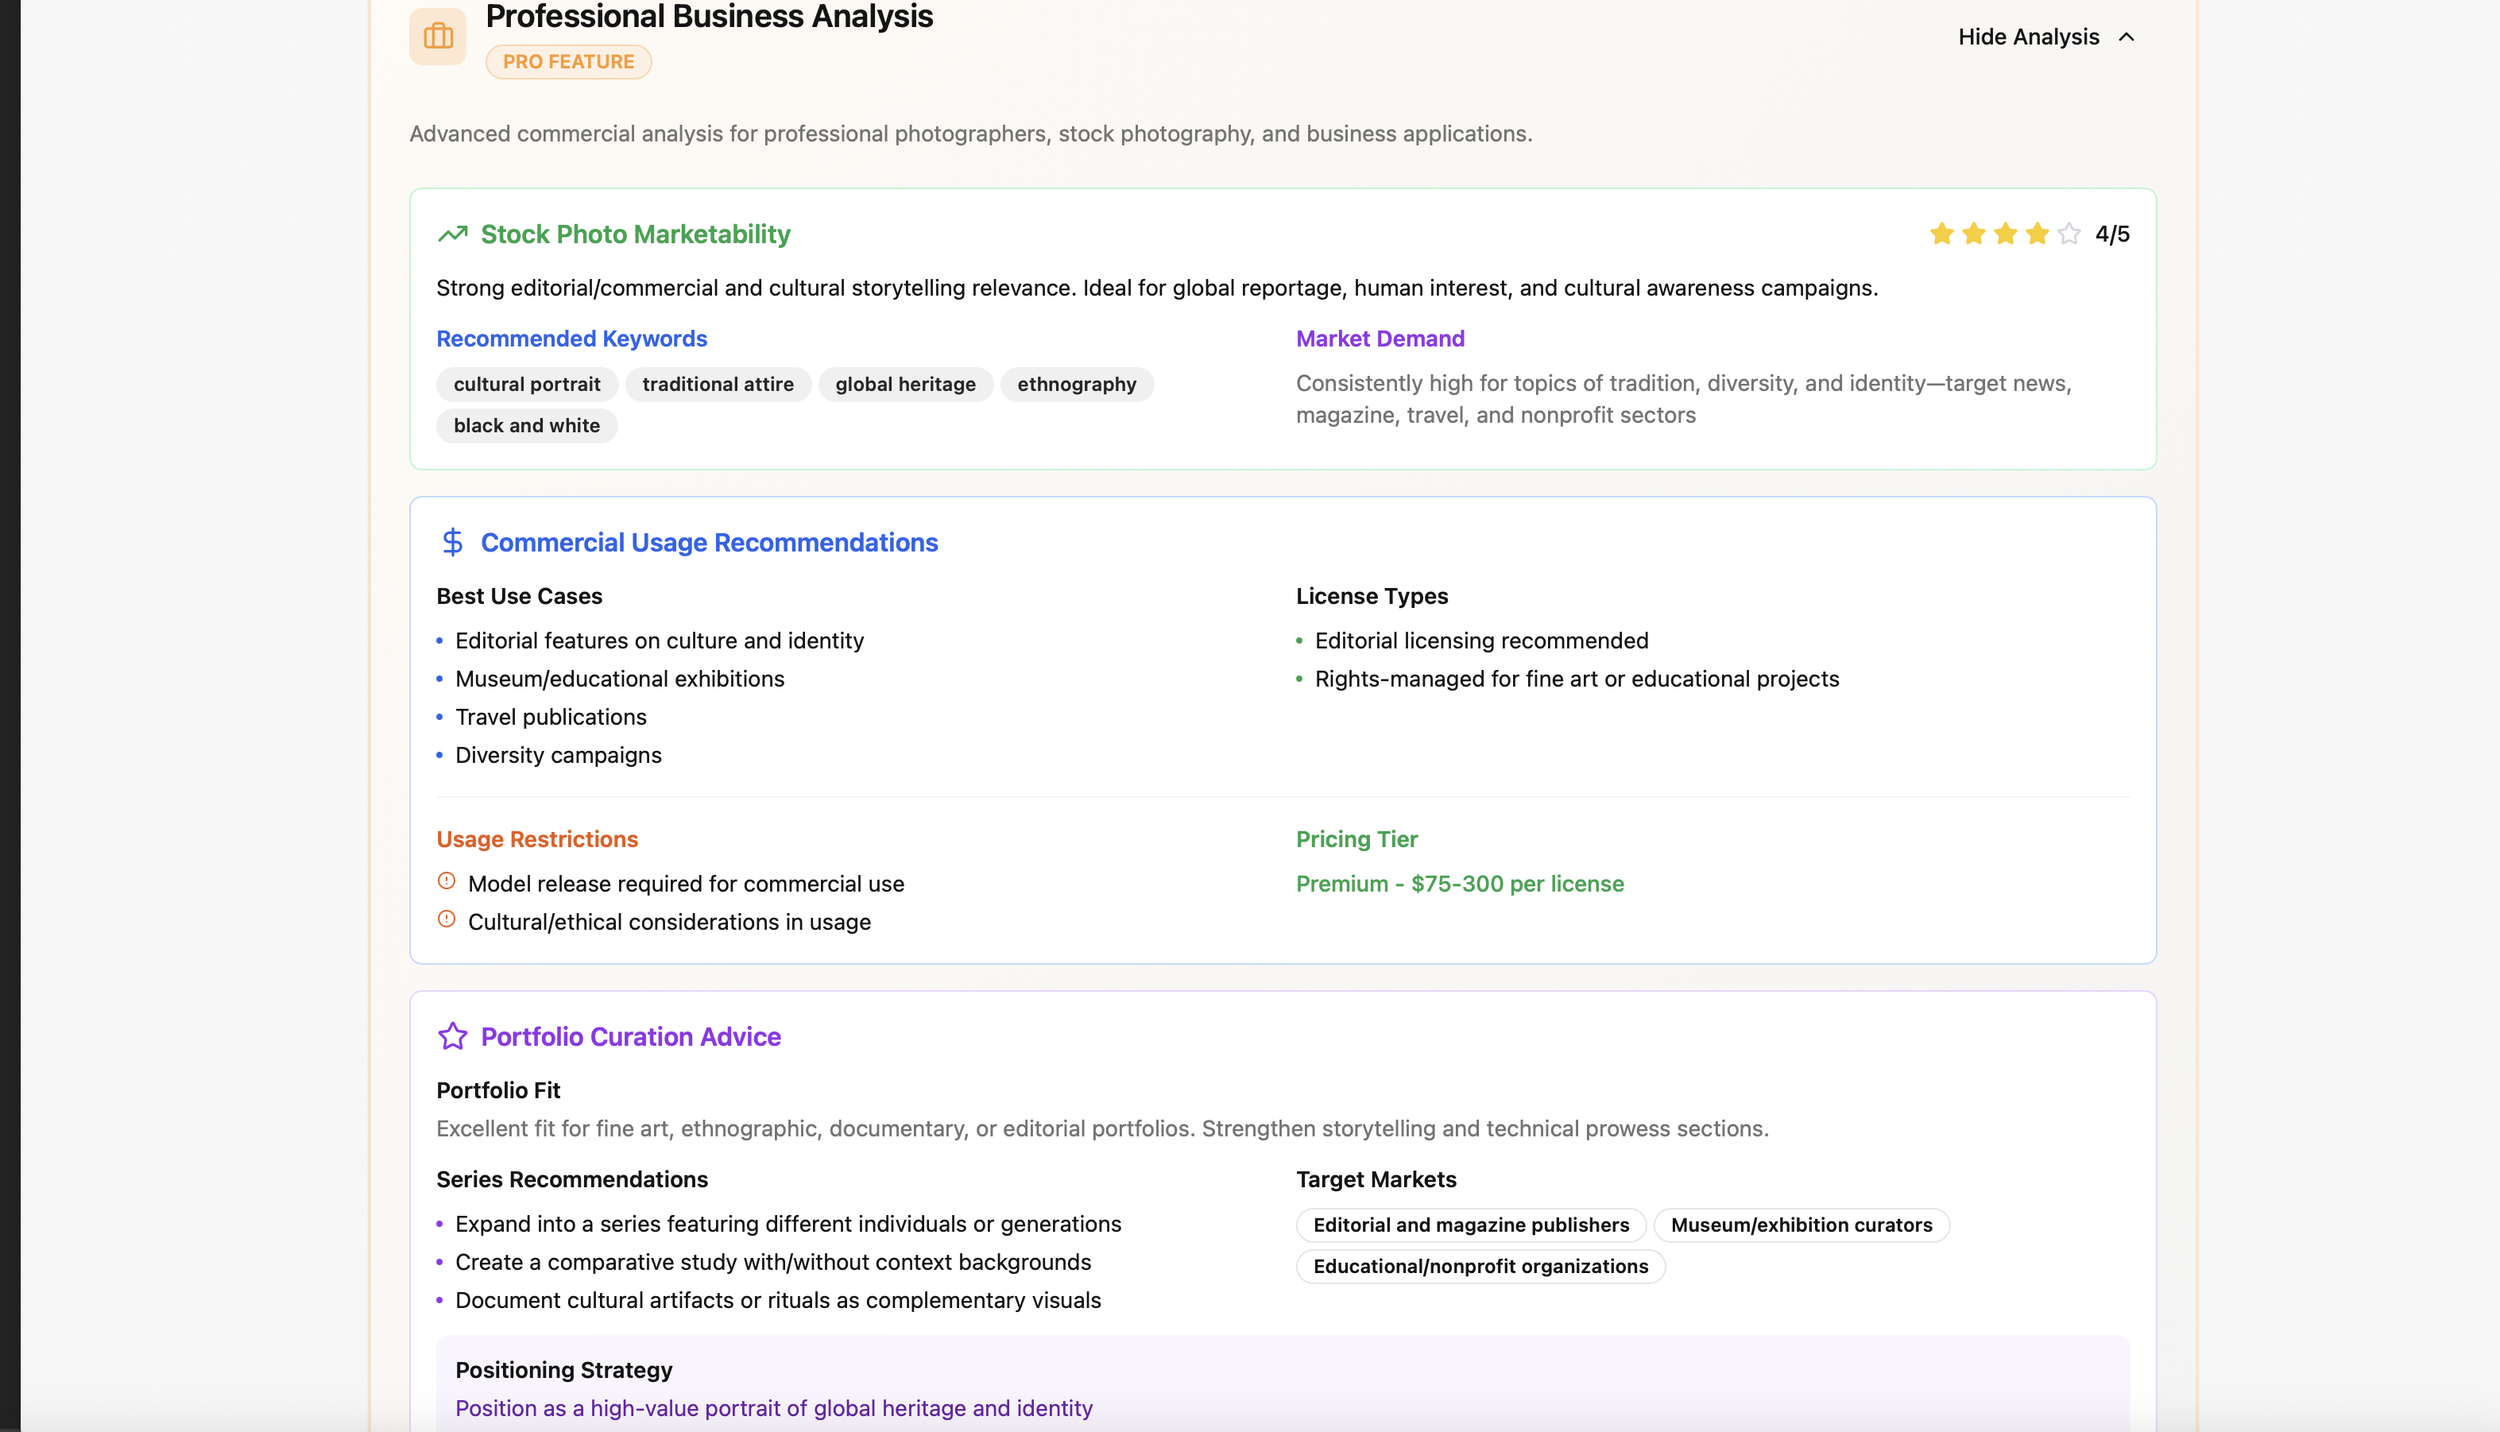
I’m back with some fresh news in this quick video update. He's built and launched Optic Owl AI, a SaaS tool designed specifically for photographers who want real, in-depth feedback on their shots instead of just vague "looks good" comments from friends. It's an AI-powered photo critique app that analyzes uploads for composition, technical stuff like exposure and focus, artistic impact, and even portfolio readiness, while suggesting improvements and inspirations from pros like Sebastiao Salgado or Steve McCurry. In this video I walk you through a live demo on one of my Tanzania photos, showing how it pulls EXIF data, spots issues like high ISO noise, gives ratings, recommends gear tweaks, generates SEO keywords for stock sites, and more, all while emphasizing privacy (photos get deleted after analysis). There's a free trial with limited analyses, then paid tiers for more detailed pro-level breakdowns. Super useful for beginners learning their craft or pros refining their work.
How Optic Owl AI Works
Upload your photo and hit analyze—it processes in about a minute or so, just like waiting on Midjourney or ChatGPT outputs.
Core Analysis Breakdown
Composition: Checks rule of thirds, framing, visual balance, use of space, focal points.
Technical: Exposure, focus, shutter speed, aperture, ISO (pulls EXIF data automatically), noise risks, quick fixes like bracketing or reducing ISO.
Artistic/Emotional: Emotional resonance, strengths, areas for improvement, creative ideas.
Ratings: Overall score (e.g., 4.3/5), technical/composition sub-scores, commercial viability, portfolio readiness (e.g., 83% ready).
Inspiration Features
Suggests photographers whose style matches (e.g., Sebastiao Salgado for environmental storytelling, Steve McCurry).
Links to Wikipedia, Google image portfolios, official sites (via search), and Amazon books.
Pro Tools
Equipment recommendations (e.g., polarizing filter, specific lenses).
SEO alt tags and keywords for stock submissions (Adobe Stock friendly).
Market demand insights, best use cases, license types.
Portfolio positioning suggestions.
Privacy and Extras
Photos sent to AI then discarded after results—no training on your images.
Save last 50 reports with thumbnails.
Print full reports (can be 8+ pages).
Email/share results to friends (look like a pro critiquing their work).
Export PDF.
Pricing and Access
First 10 analyses free to try. Sign up (free account) for one pro-level freebie after that. Then subscribe for tiers like basic (25 analyses) or pro (100 analyses). Extra packs available if you need more.
If you're into photography and want an always-on mentor to level up your shots, check out Optic Owl AI at opticowl.ai. I’m stoked about it after all the dev work, and it seems like a solid tool for honest, actionable feedback.
Ethiopia is rich in story telling and the drive to the Omo Valley was no exception for photo opportunities, where every image tells a story.